Topic 1: Accessibility Checkers
When remediating documents for accessibility, your first action should be to run an accessibility checker, which is a tool similar to spell-check. It can check your document for alternative text, reading order, contrast, headings, nesting order, formatting, and other issues in order to make it accessible for individuals with impairments and for those who utilize alternative formats.
Where to Find the Checker
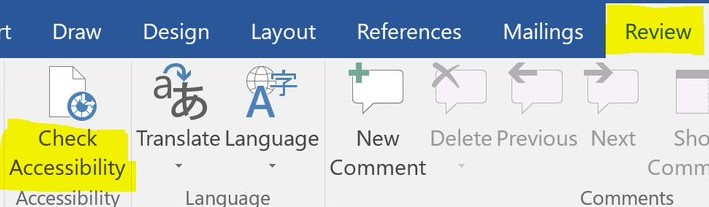
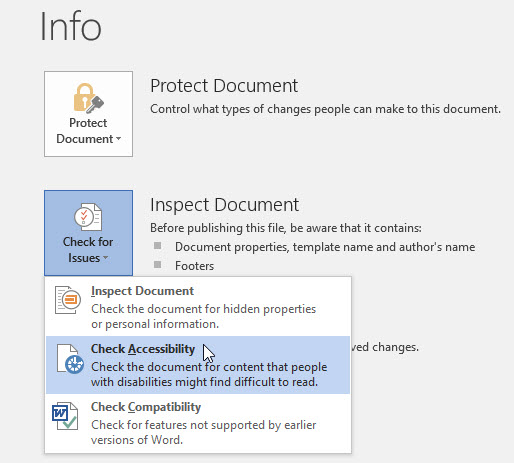
Some software programs such as Microsoft Word, Excel, PowerPoint and even Adobe Acrobat Pro have built-in accessibility checkers in their more recent versions. Depending on which version you are using, the accessibility checker may be found on the Microsoft ribbon under the “Review” tab (Image 1) or by clicking on the file tab, check for issues drop-down, then select check for accessibility (Image 2).
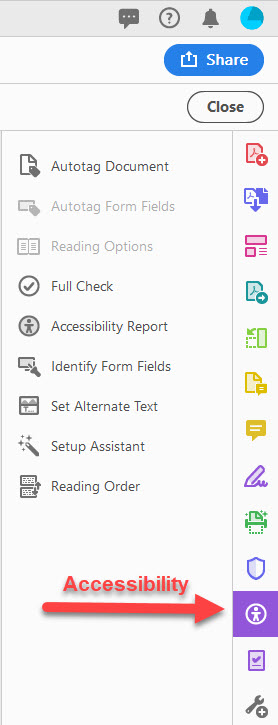
For Adobe Acrobat Pro, you will need to go to “Tools” and add the Accessibility Checker to your shortcut selection by clicking “Add.” Return to your document and click the “Accessibility” icon. Within your menu, you can now run a “Full Check” or address individual accessibility factors such as alternative text and reading order, before running the check (Image 3).
How to Use an Accessibility Checker
The accessibility checker will locate the issues within your document which need remediating and will provide you with a list of them. It is important to note that accessibility checkers do not rectify the issues automatically, you will need to address each issue yourself. With most checkers, you will need to click on the issue to highlight or locate the issue within the document, once found, you can correct as needed. The Microsoft Office accessibility checker will even provide directions on how to re-mediate each issue. As each issue is corrected, it will disappear from the list of issues in Microsoft; however; in Adobe Acrobat Pro, you must “Check Again” to see if you successfully eliminated the issue.